


-
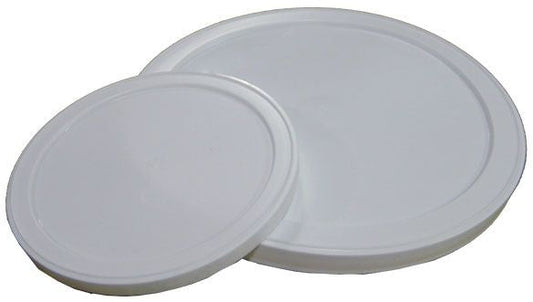
#10 Plastic Lid
Fits #10 Cans | Opaque Plastic | BPA Free Looking for an additional lid for your 5 Gallon Stackable? You've found it!Convenient plastic lid for covering your food storage once it has been opened for consumption. Great addition to your family's food storage and...- $1.49
$1.64- $1.49
- Unit price
- per
-
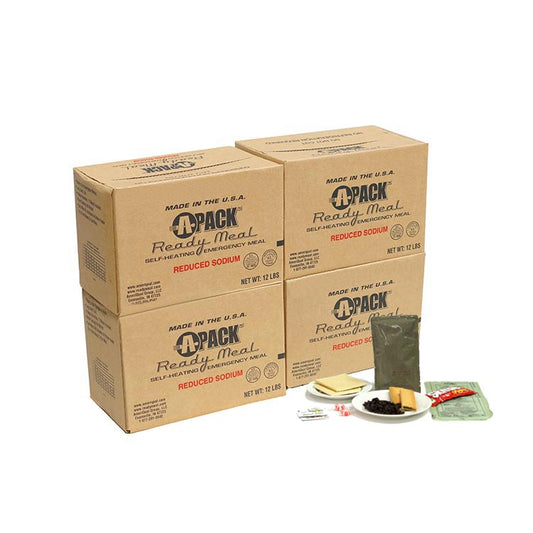
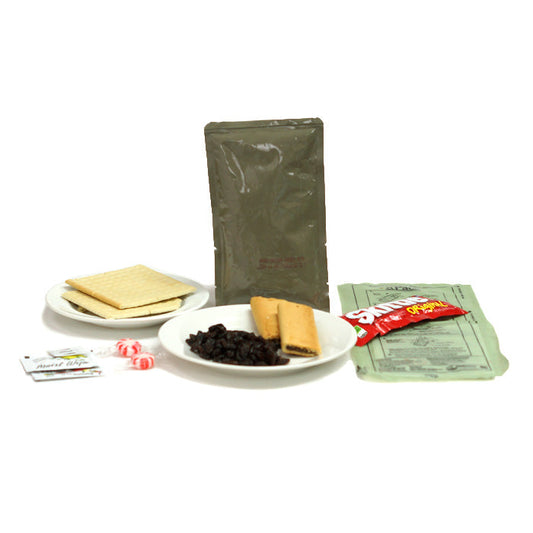
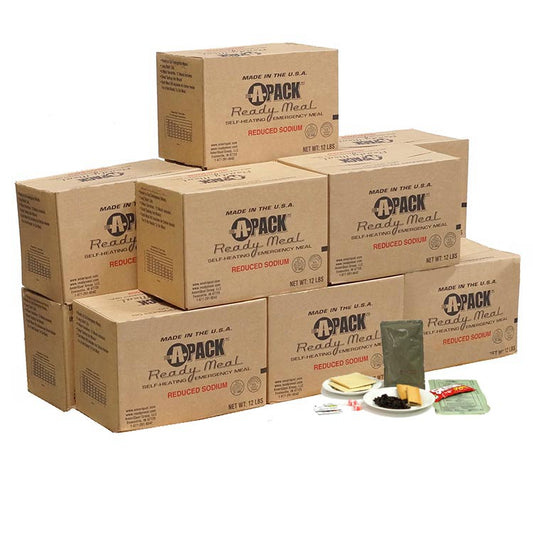
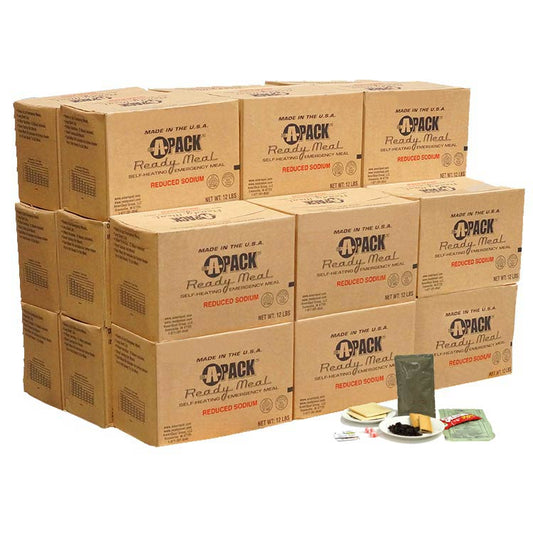
1 Month Supply - MRE Self-Heating Full Meals
Military-grade MREs - Our MREs are manufactured to deliver high-quality taste and long shelf life by a company even the US Military trusts. Quick and easy-to-store food supply option - Enjoy this 1-month supply of food that won't take up too much of your space and...- $405.99
$699.96- $405.99
- Unit price
- per
-
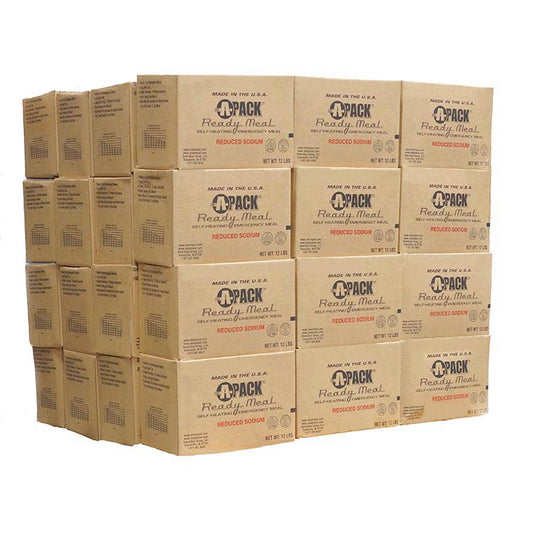
1 Year Supply - Bulk MRE Self-Heating Full Meals
1-Year Supply of MREs in Bulk Simple food storage option - MREs are a very simple option to use for food storage and this supply will last you 1 year at 1,700 calories per day. Don't waste valuable time cooking- These MREs can be eaten right...- $4,619.99
$8,399.52- $4,619.99
- Unit price
- per
-
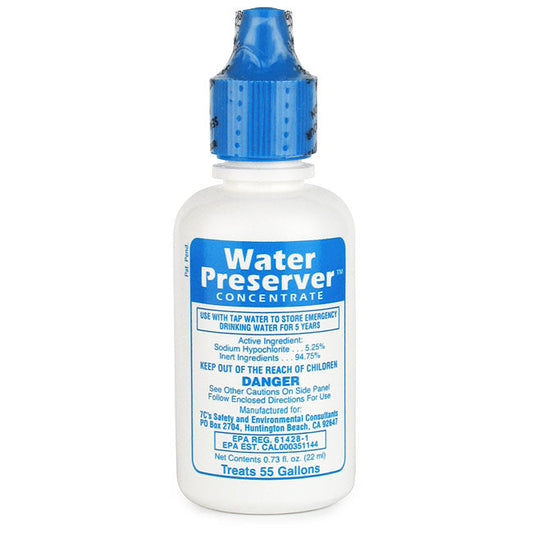
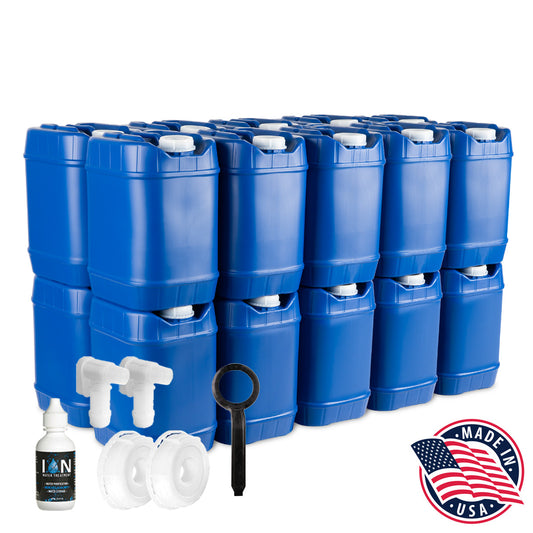
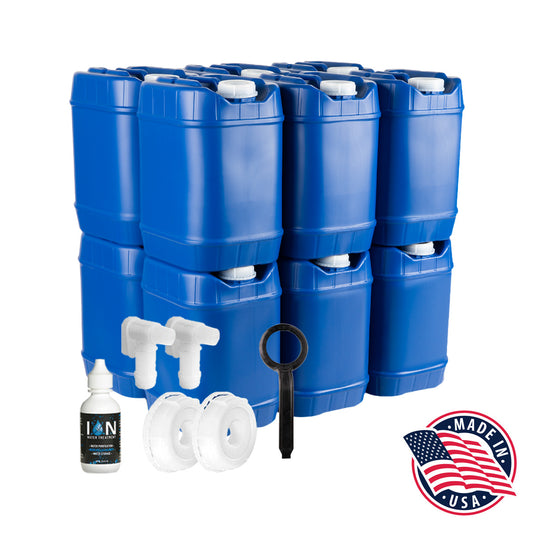
100-Gallon Stackable Water Container Essentials Kit
200 days of emergency water | BPA-free plastic | Water Preserver Included Save space and time with convenient water storage - Instead of having a huge water container or something too heavy to handle, go with the 20-count kit! It has 100 gallons of water...- $429.99
$779.99- $429.99
- Unit price
- per
-
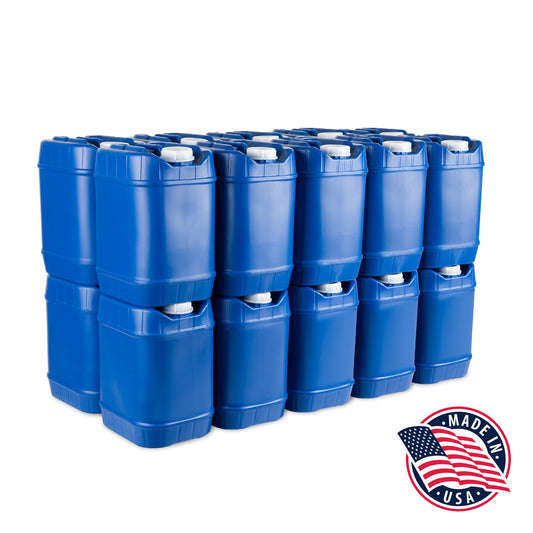
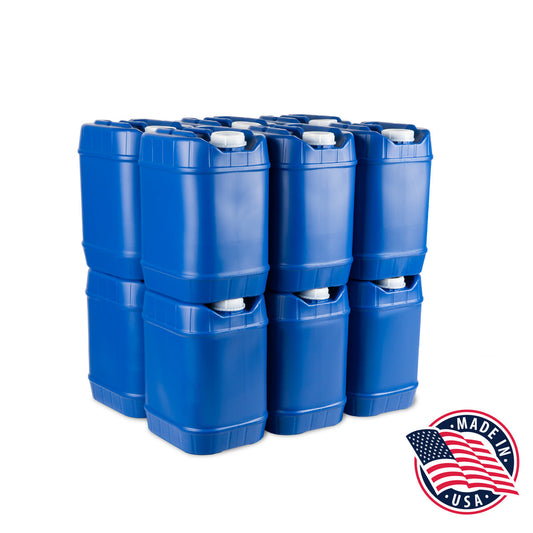
100-Gallon Stackable Water Container Kit
200 days of emergency water | BPA-free plastic | Stack and save space Convenient Water Storage/Save Space- Rather than having a large water container that is too heavy to handle, go with our 20-count 5-gallon stackable container kit! It can store 100 gallons of water in a...- $410.00
$729.99- $410.00
- Unit price
- per
-
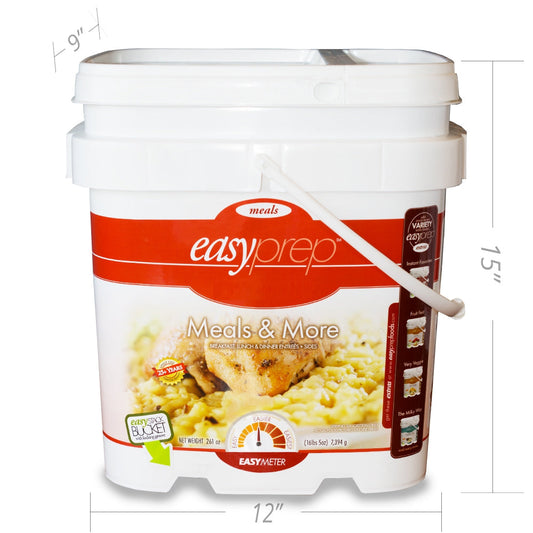
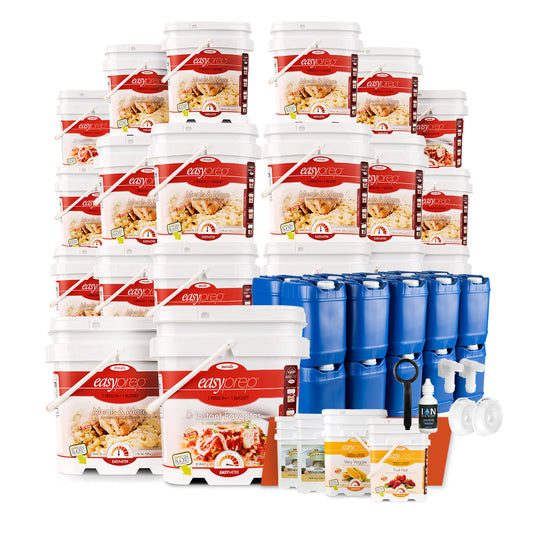
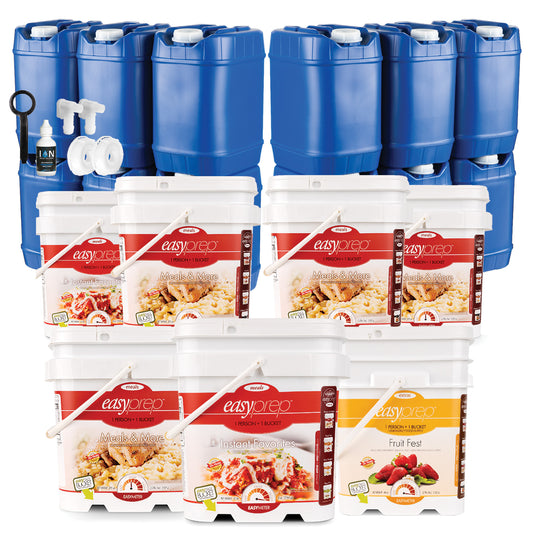
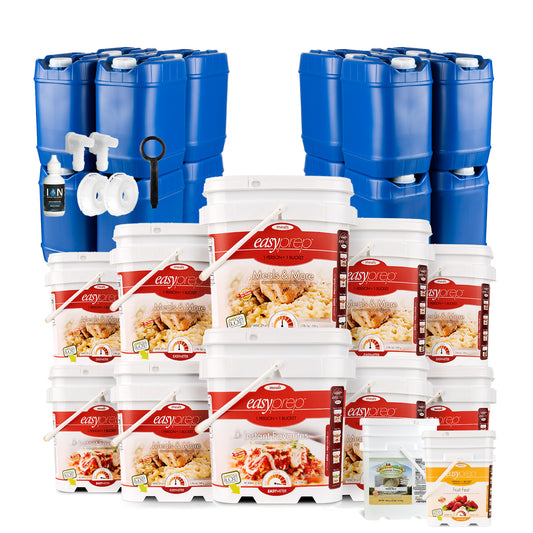
12-Month Emergency Food Storage Essentials Kit
Twenty-Four Buckets of Freeze Dried Emergency Food Storage Meals | Plus 100 Gallons of Water Storage Easy To Prepare Meals -The meals are very easy to prepare. With the majority of foods, all you have to do is add water - making preparation quick. Long...- $2,999.99
$8,188.92- $2,999.99
- Unit price
- per
-
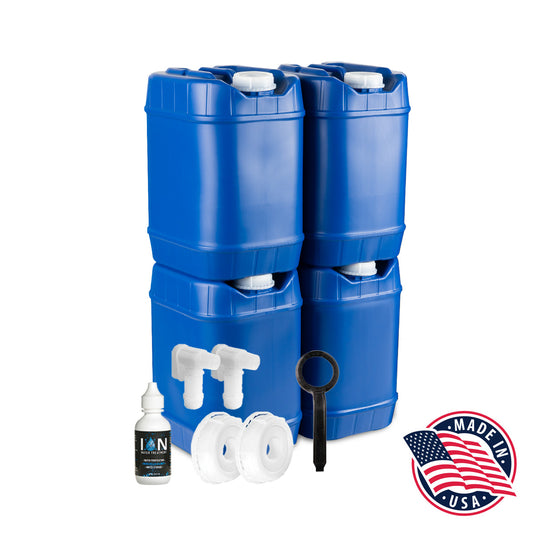
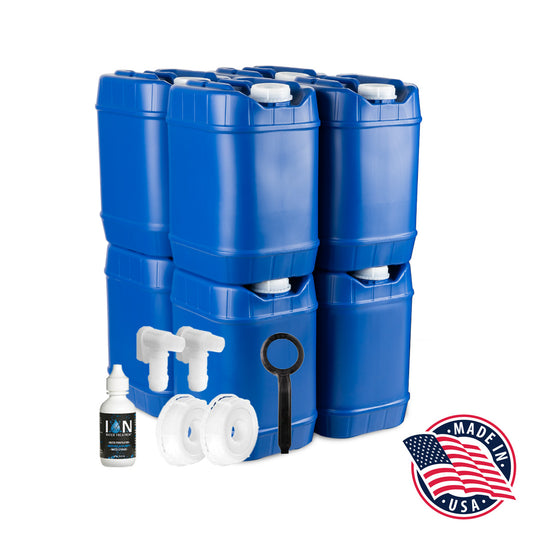
20-Gallon Stackable Water Container Essentials Kit
40-day drinking water supply Essentials With Water Preserver Enough water for an emergency - Protect yourself and your family with 4 of these 5-gallon stackable water containers. Its recommended that you have one gallon of water per person per day in an emergency. This will...- $127.99
$184.99- $127.99
- Unit price
- per
-
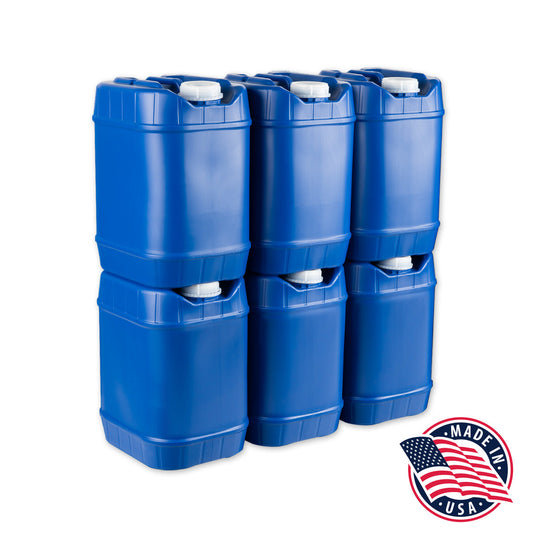
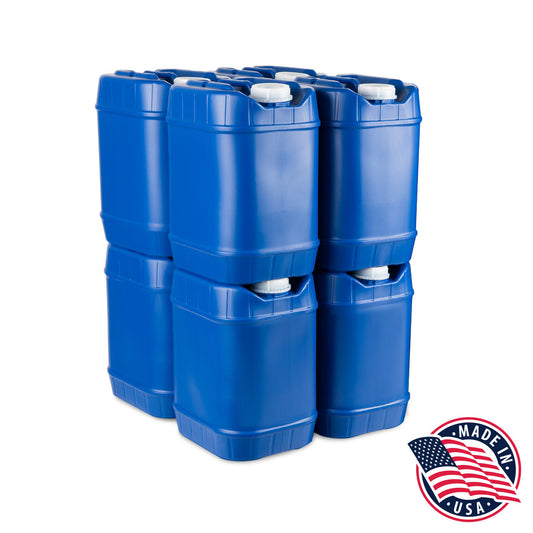
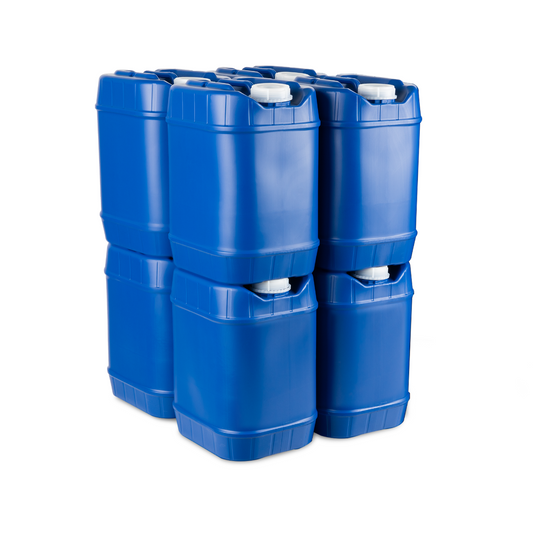
20-Gallon Stackable Water Container Kit
40-day Drinking Water Supply Stackable Water Containers Enough water for an emergency - Protect yourself and your family with 4 of these 5-gallon stackable water containers. Its recommended that you have one gallon of water per person per day in an emergency. This will keep fresh...- $92.00
$145.99- $92.00
- Unit price
- per
-
3 Month Supply - MRE Meals
12 Case Supply of MREs With Up to 5-Year Shelf-Life | No Cooking Required Military-Grade MREs - Ameriqual delivers high-quality and long-lasting MREs that are dependable and trusted enough to be used by the US Military. Easy Emergency food Storage Option - This supply of MREs has...- $1,196.99
$2,099.88- $1,196.99
- Unit price
- per
-
3-Month Emergency Food Storage Essentials Kit
Six Buckets of Instant Freeze Dried Emergency Food Storage Meals - Plus Water Storage Easy To Prepare - The meals are very easy to prepare. With the majority of foods, all you have to do is add water - making preparation quick. LONG LASTING SHELF LIFE - This...- $1,199.99
$2,796.92- $1,199.99
- Unit price
- per
-
30-Gallon Stackable Water Container Essentials Kit
30 Days of Emergency Water Storage With Water Preserver Emergency Water Solution - It's recommended that you have 1/2 gallon of water per person per day for any emergency. This will provide you with 30 gallons (6 containers that are 5 gallons each)- about 30 days...- $168.99
$259.99- $168.99
- Unit price
- per
-
30-Gallon Stackable Water Container Kit
30 Days Emergency Water Storage Containers Emergency Water Solution - It's recommended that you have 1 gallon of water per person per day for emergency situations. This will provide you with 30 gallons (6 containers that are 5 gallons each)- about 30 days of drinking water...- $135.00
$218.99- $135.00
- Unit price
- per
-
40-Gallon Stackable Water Container Essentials Kit
80 Days of Emergency Water Storage Essentials Kit With Water Preserver Complete Emergency Water Storage Solution - It's recommended that you have 1/2 gallon of water per person per day for any emergency. This kit will provide you with 40 gallons (8 containers that are 5 gallons...- $207.99
$329.99- $207.99
- Unit price
- per
-
40-Gallon Stackable Water Container Kit
80 Days of Emergency Water Storage Container Kit Complete Emergency Water Storage Solution - It's recommended that you have 1/2 gallon of water per person per day for any emergency. This kit will provide you with 40 gallons (8 containers that are 5 gallons each)- about...- $176.00
$291.99- $176.00
- Unit price
- per
-
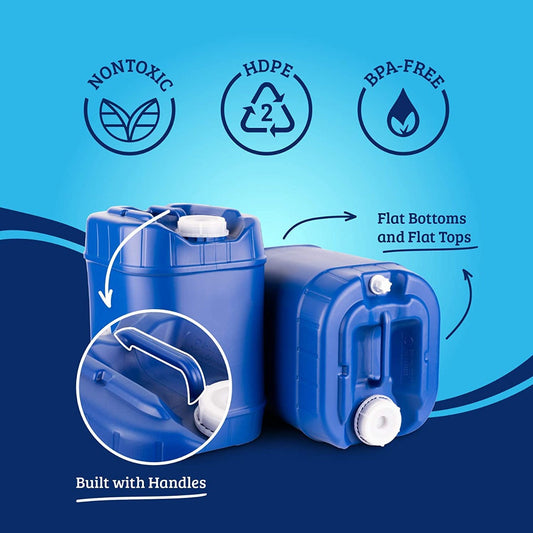
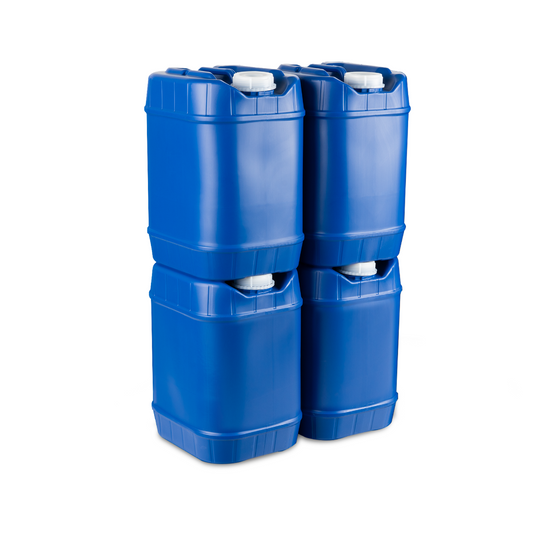
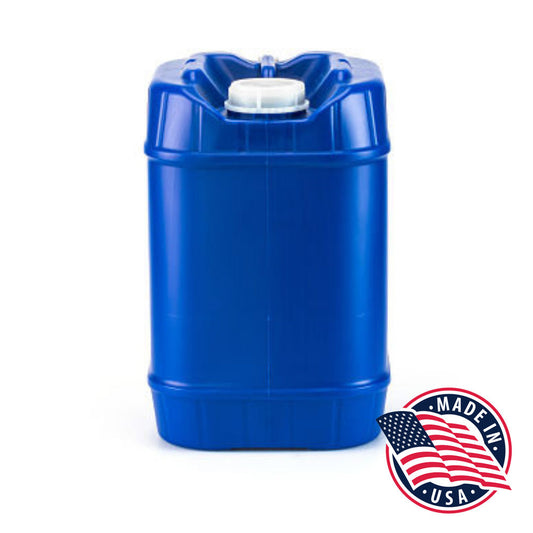
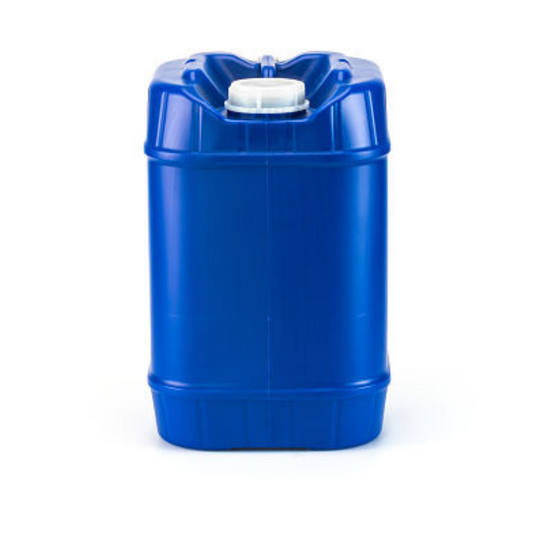
5-Gallon Stackable Water Container
5 Day Supply of Emergency Water Storage Container Emergency Water for Your Family - This container holds 5 gallons of drinking water, allowing you to stay hydrated during an emergency or stay safe if public water supplies become contaminated. High-quality container - This container is made in...- $24.99
$36.50- $24.99
- Unit price
- per
-
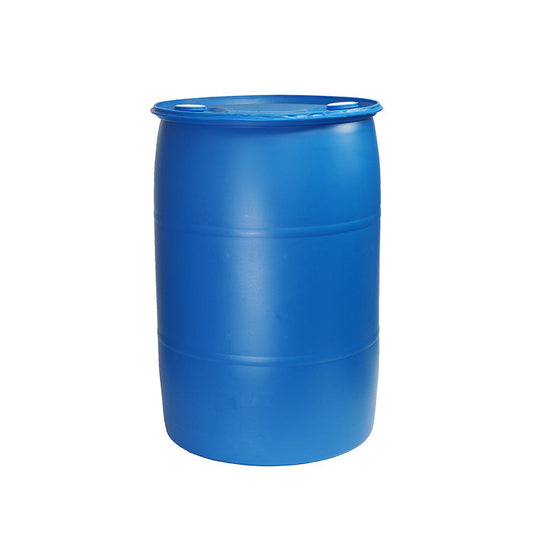
55-Gallon Water Storage Barrel
110 Days of Emergency Water Storage Barrel Non-Toxic & BPA Free - This 55-gallon water barrel is made from 100% non-toxic food-grade plastic and is BPA-free. Up to 110 days of drinking water - The 55-gallon water container holds almost 4 months of drinking water supply for...- $199.99
$249.99- $199.99
- Unit price
- per
-
6 Month Supply - MRE Self-Heating Full Meals
24 Cases of Bulk Military Meals Ready To Eat (MREs) Simple Emergency Food Storage - This supply of MREs has been put together to last you 6 months and will be readily available in any situation. Save Time Cooking - These MREs can be eaten right out...- $2,349.99
$4,199.76- $2,349.99
- Unit price
- per
-
6-Month Emergency Food Storage Essentials Kit
Twelve Buckets of Freeze Dried Emergency Food Storage Meals | Plus Water Storage Containers Easy To Prepare - The meals are very easy to prepare. With the majority of foods, all you have to do is add water - making preparation quick. Long Lasting Shelf...- $1,699.99
$4,342.92- $1,699.99
- Unit price
- per
-
60-Gallon Stackable Water Container Essentials Kit
120 Days of Emergency Water Storage Container Essentials Kit With Water Preserver Space Saving Stackable Water Storage - Instead of having a huge water container or something too heavy to handle, go with the 12-count kit! It has 60 gallons of water in a small space. Each...- $285.99
$489.99- $285.99
- Unit price
- per
-
60-Gallon Stackable Water Storage Container Kit
120 days of Emergency Water Storage | Stackable Water Containers Save Space Storing Emergency water - Instead of having a huge water container or something too heavy to handle, go with the 12-count kit! It has 60 gallons of water in a small space. Each container is 5...- $258.00
$437.99- $258.00
- Unit price
- per
1 Month Supply - MRE Self-Heating Full Meals
Military-grade MREs - Our MREs are manufactured to deliver high-quality taste and long shelf life by a company even the US Military trusts. Quick and easy-to-store food supply option - Enjoy this 1-month supply of food that won't take up too much of your space and...
- $405.99
$699.96- $405.99
- Unit price
- per
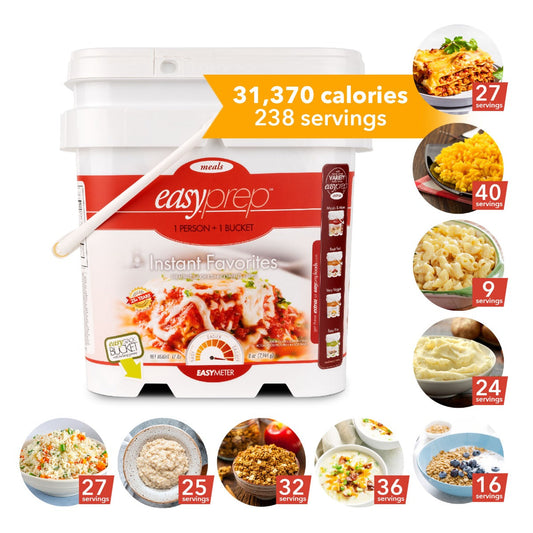
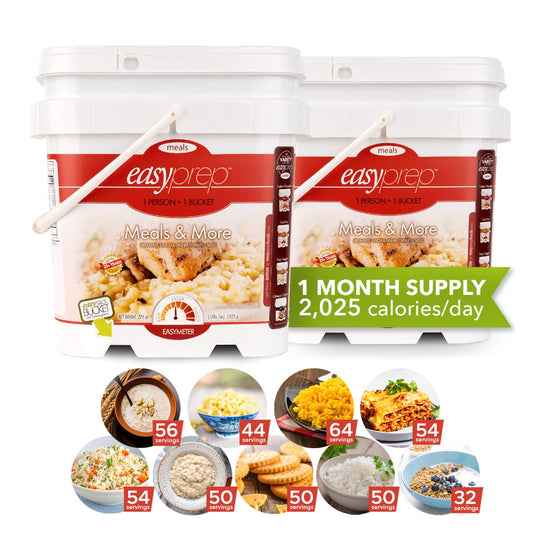
EasyPrep 1-Month Emergency Food Supply
Two Buckets of Instant Emergency Food Storage Meals Just Add Water - Meals are very easy to prepare. With the majority of foods, all you have to do is add water - making preparation quick. 30 Year Shelf Life - This isn’t your normal dry food...
- $288.88
$659.99- $288.88
- Unit price
- per
Saratoga Farms 1-Month Emergency Food Supply
Emergency 1-Month Food Supply Kit Easy-to-Prepare Meals - This kit is filled with READY-to-eat, just-add-water meals. Be READY with a meal at any time! The majority of these items can be quickly prepared by just adding water. Easy 1-Month Supply Food Storage - The...
- $599.00
$999.00- $599.00
- Unit price
- per


Recently Viewed Products
Example product title
- $19.99
- $19.99
- Unit price
- per
Example product title
- $19.99
- $19.99
- Unit price
- per
Example product title
- $19.99
- $19.99
- Unit price
- per
Example product title
- $19.99
- $19.99
- Unit price
- per
Example product title
- $19.99
- $19.99
- Unit price
- per
Example product title
- $19.99
- $19.99
- Unit price
- per
Example product title
- $19.99
- $19.99
- Unit price
- per
Example product title
- $19.99
- $19.99
- Unit price
- per
Example product title
- $19.99
- $19.99
- Unit price
- per
Example product title
- $19.99
- $19.99
- Unit price
- per
- Choosing a selection results in a full page refresh.